40 Party Decor Ideas Under $20 That Look Expensive in 2026
Transform any gathering with 40 cheap DIY party decor ideas under $20 that look expensive in 2026—stylish, impressive, and budget-friendly.
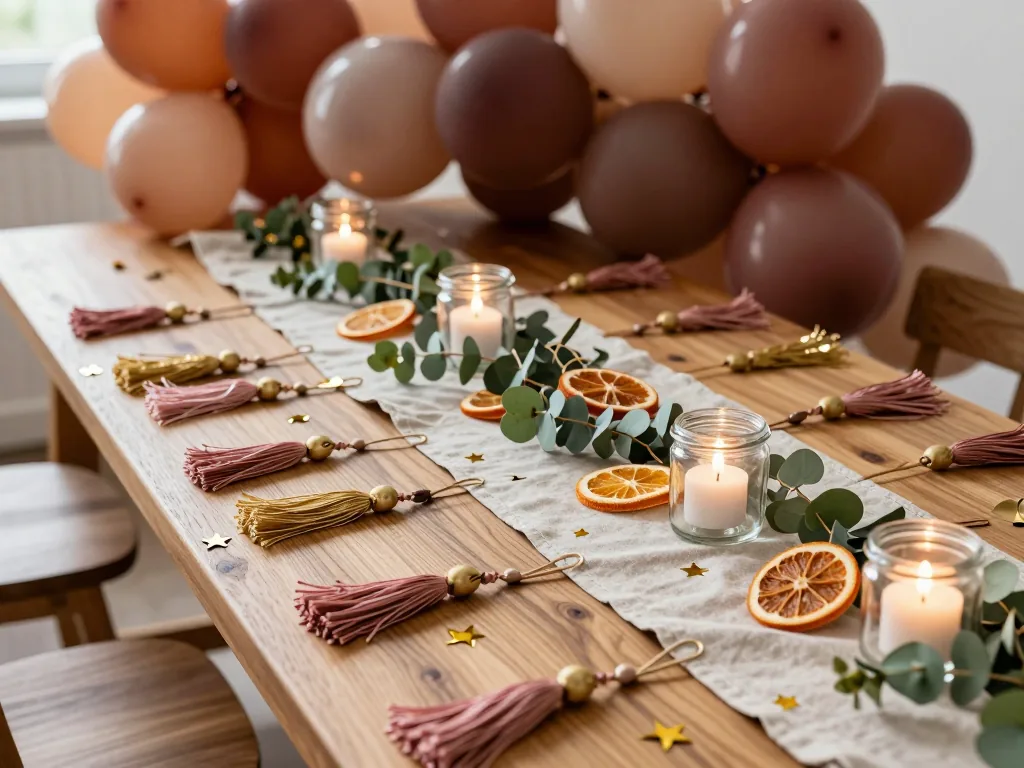
Hosting a memorable celebration doesn’t have to drain your savings—especially in 2026, when smart styling trumps hefty price tags. Ever scrolled past gorgeous event photos and assumed they cost a fortune? This guide is your reality check. Inside, you’ll find 40 budget-friendly DIY decor ideas, each under $20, that mimic high-end textures, dramatic lighting, and bespoke details. Sculptural paper florals. Thrifted glassware tricks. You’ll learn exactly how to fake that “expensive” look without the splurge. Your next party feels five-star, even on a shoestring.
Understanding the 2026 Budget Decor Landscape
Why DIY Beats Store-Bought in 2026
The equation has flipped. With 68% of U.S. adults now actively preferring handmade decorations over retail options, and DIY craft supplies growing at a steady 4.2% annually, the market has spoken. Personalization and cost control are no longer just nice-to-haves—they’re the driving force behind every party planning decision. Consider the classic store-bought plastic balloon arch, which still runs anywhere from $25 to $40 for a single-use installation. In 2026, that feels both wasteful and wildly overpriced. You can build a show-stopping paper fan backdrop for roughly $8 to $15 in materials. The plastic ends up in a landfill; the paper fan folds flat for your next event or gets recycled. The DIY route isn’t just cheaper—it’s smarter, more sustainable, and infinitely more tailored to your specific color palette and theme. You’re not settling for what the store has in stock; you’re curating exactly what your space needs.
The “Budget Luxury” Mindset
Search for party inspiration in 2026, and the most-searched keyword isn’t “cheap” or “on sale”—it’s “budget luxury.” This is a deliberate psychological shift. Instead of scattering twenty tiny, forgettable trinkets across a table, you invest in three or four large, dramatic focal points that command attention. Think oversized geometric shapes in metallic cardstock, towering accordion fans in a single saturated hue, or a layered string-light canopy that instantly warms a bare wall. The secret sauce is scale, symmetry, and lighting. A $20 budget spent on one massive 3-foot paper honeycomb ball hung from the ceiling reads as “event designer” far more convincingly than $20 spent on a grab bag of plastic confetti and mini banners. Symmetry matters too—two identical large fans flanking a dessert table create a sense of intentional, high-end composition. And never underestimate warm, low lighting: a few $10 clip-on warm LED lights aimed at your focal pieces can make even a dollar-store tablecloth look like textured linen. The goal is to make your eye land on fewer things, but make each one feel monumental. That’s the 2026 way: spend less, arrange smarter, and let the lighting do the heavy lifting.
Sourcing Materials Without the Craft-Store Markup
The Dollar Store Goldmine
Skip the big-box craft retailer and head straight to the nearest dollar store, where the whole trip can stay under $10. Tissue paper, baker’s twine, clear tape, foam board, and a single pot of chalk paint form your core arsenal. With just those five items, you can build a textured backdrop, a hanging garland, or tiered cake stands from stacked plates and candlesticks. One dollar store run yields materials for five to eight different projects, so don’t fall for “pre-made party packs.” Those kits—often packed with flimsy banners and generic cupcake toppers—carry a markup of roughly 300% over raw supplies. Instead, buy the basics: a roll of white tissue paper ($1–$2) turns into pom-poms, fringe, and table scatter. A sheet of black foam board ($1–$3) becomes a photo booth frame or geometric centerpiece base. Chalk paint ($3–$6 per small jar) transforms plain glass vases into matte, expensive-looking vessels.
Free and Nearly-Free Resources
Check your local library’s website before spending a cent on printables. Most systems now offer free access to template libraries—banners, cupcake toppers, photo booth props—that you can download and print at home. Community blogs and Pinterest boards also host dozens of high-resolution, free templates. The real cost is the ink, not the design. Color cartridges run $8–$15 per set, so print in black-and-white and hand-color with markers or watercolor pencils. That approach saves money and adds a handcrafted charm that looks deliberately curated. For structural elements, skip foam board and raid your recycling bin instead. Old shipping boxes are free and just as sturdy for standing signs, table numbers, or a giant “2026” backdrop. Finally, join a local “buy nothing” group on social media—these hyper-local communities regularly give away leftover wrapping paper, fabric scraps, and glass jars. A quick post asking for “party leftovers” often yields ribbon, votive holders, and even unused streamers. The key is to treat materials as interchangeable, not branded. A wine bottle wrapped in brown paper and twine looks like a $40 centerpiece, yet it costs nothing if the bottle came from your own recycling bin.
Lighting That Creates Instant Atmosphere
The fastest way to elevate a party from “casual gathering” to “curated event” isn’t expensive centerpieces or a catered spread—it’s light. In 2026, the gap between budget and luxury has narrowed dramatically, thanks to smart LED technology and a renewed love for upcycled glass. Start with battery-operated LED string lights, which have dropped roughly 15% in price since 2023, making them the single best investment you can make for under $10. Look for warm-white or amber tones, not cool blue, to mimic candlelight. Drape them inside large glass apothecary jars for a glowing focal point on a sideboard, weave them through pre-made paper fans (a pack of 20 costs under $8) to create a dimensional ceiling cloud, or hang them in vertical “curtains” behind the snack table—just use clear command hooks and let the strands cascade from ceiling to floor. The effect is instant, expensive-looking, and completely reusable.
For a second layer, embrace candle and jar lanterns. Do not buy new votive holders—instead, upcycle empty wine bottles and mason jars you already have. Wash them thoroughly, remove labels with warm soapy water, and paint the outside with a single coat of chalk paint in matte white or soft grey. This creates a frosted, premium frosted-glass look that hides any imperfections. Once dry, drop in a flickering LED tea light (a pack of 24 costs between $4 and $6) rather than a real flame, so you can leave them unattended. The trick that makes this look high-end: place the painted jars on a mirrored tray from a thrift store—typically $3 to $7—which instantly doubles the light output and adds depth to the table. Cluster them in odd numbers (three, five, seven) at different heights by stacking a few on upside-down coffee mugs or small books. This layered approach creates soft pools of warm light that make even a cramped apartment feel like a boutique venue.
“Lighting is the cheapest way to make a room feel expensive—never skip it.”
Combine the string lights and the jar lanterns in the same space, but keep them at different vertical levels: string lights above eye level, lanterns on tables or the floor. Your guests will notice the glow before they notice anything else, and they’ll never guess you spent less than $15 total.
Large-Scale Geometric Statements
The fastest way to make a party look expensive? Think installation, not decoration. In 2026, the dominant aesthetic is “maximalist minimalism”—bold, graphic shapes rendered in a tight, intentional palette. You don’t need dozens of small accents. You need three or four large, confident moves. That’s where cardboard and tissue paper become your best friends.
Cardboard Hexagon and Circle Walls
Skip the printed banners. Instead, source large sheets of recycled cardboard or foam board from a local moving supply store or art supply shop—expect to pay anywhere from $8 to $15 per 4x8-foot sheet. Using a straightedge and a craft knife, cut out oversized hexagons and circles in three different sizes: think dinner-plate, serving-tray, and pizza-box scale. Paint them with chalk paint in two or three coordinated colors. For 2026, consider deep oxblood, warm cream, and sage green, or a high-contrast black and ivory. Chalk paint dries matte and slightly textured, which catches light beautifully and hides the cardboard’s corrugation. Once dry, arrange the shapes in a clustered, slightly overlapping wall installation directly behind the main table. Use double-sided tape or small nails if the wall allows. The trick is to keep the spacing tight—about 2 to 4 inches between shapes—so the cluster reads as one cohesive sculpture, not scattered cutouts. This single installation does the heavy lifting of a full backdrop, and it costs between $12 and $20 for materials total, depending on how many shapes you cut.
Paper Fan Backdrops
For a softer, more lush alternative, buy 10 to 12 packs of standard 20-inch tissue paper (about $6 to $10 total). Fold each sheet accordion-style in 1-inch pleats, pinch the center, and fan out both sides to create a half-circle. Tape the flat edge to a length of twine or thin wire, then hang the string in a gentle swag. Cluster the fans in varying sizes—use two sheets for large fans, one sheet for medium, and half a sheet for small—and overlap them so you see only the pleated edges, not the tape. The result? A dense, textured wall that mimics a high-end floral installation or a $40 balloon arch, but for under $10. To elevate the look further, mix two complementary colors (like blush and terracotta) and one neutral (cream or ivory) so the eye moves across the surface without chaos. Both options take about two hours to assemble, and they photograph like a dream—which is, after all, the real test of an expensive-looking party.
Upcycling Household Items for Premium Looks
The most luxurious-looking details in event styling are often the ones with the lowest material cost—what you’re really paying for is the illusion of effort. In 2026, the upcycling trend has moved far beyond rustic charm. It’s now about clean lines, sculptural silhouettes, and finishes that mimic high-end ceramics or brushed metal. And the best part? You likely have the raw materials sitting in your recycling bin or linen closet right now.
Wine Bottle Centerpieces
Start saving your empties, or ask a local bar for their discarded bottles—they’re usually happy to give them away. Soak the bottles in warm, soapy water to loosen the labels, then scrub them off completely. Once dry, spray-paint them in either a high-gloss metallic (think champagne gold or gunmetal) or a matte, stone-like finish like warm taupe or sage. For a softer, more romantic look, wrap the bottles tightly in natural twine or thin lace ribbon from the base to the neck, securing the ends with a dab of hot glue. These work beautifully as vases for a single stem—a dramatic dahlia or a sprig of eucalyptus—or as candle holders: simply insert a taper candle into the neck and let it sit at a slight angle for a modern, sculptural vibe. For a table runner effect, cluster three bottles of varying heights down the center of the table. The total cost is roughly $8 to $15 per set of six, depending on your paint finish and ribbon choice.
Cardboard Box Photo Booth Frames
A photo booth prop that looks like a custom gold-leaf frame costs almost nothing if you build it yourself. Take a large, sturdy cardboard box—the kind from a flat-screen TV or a large appliance—and cut a thick rectangle out of the center, leaving a border of at least four inches. That’s your frame. Paint the entire border with a metallic gold or matte black spray paint, using two coats for full coverage. For extra dimension, glue on decorative trim made from old curtain tassels or even crunched-up paper painted to look like carved molding. Attach a wooden dowel or a sturdy paint stirrer to the bottom edge with strong duct tape, so guests can hold it up to their faces. This prop will photograph as a high-end, gallery-style frame, and it costs between $4 and $10 for the paint and stick.
More Zero-Cost Upcycles to Try
- Egg cartons: Cut the individual cups apart, paint them in ombre shades of blush or terracotta, and arrange them in a honeycomb pattern on a foam board. You’ve just made a geometric flower wall that looks like a designer installation.
- Toilet paper rolls: Flatten them, cut them into equal-width rings, then fold each ring into a hexagon. Glue them together to form a hanging honeycomb ball—spray them white or pastel for a cloud-like ceiling feature.
- Old bedsheets: Drape white or cream sheets from the ceiling in a radial pattern, gathered at a central point above the table. This creates a soft, billowing canopy that mimics expensive fabric draping, costing you nothing but a few safety pins and command hooks.
Printable and Digital Decor Hacks
The most budget-friendly way to achieve a high-end look is to stop buying decor and start printing it. Before you spend a dime on paper goods, check your local library’s website. Most library systems offer free access to premium template databases like Canva Pro or Creative Fabrica, but you don’t even need those. A simple search for “party banner template,” “cupcake topper template,” or “table number template” will yield thousands of free, high-resolution designs. The trick is to print on cardstock, not photo paper. Cardstock is significantly cheaper—roughly $0.10 to $0.25 per sheet versus $0.50 to $1.00 for glossy photo paper—and it gives your decor a matte, textured feel that mimics expensive letterpress stationery. Invest in a $15 to $25 paper cutter; clean, straight edges are the single biggest factor separating a DIY project from a store-bought look.
Now, the elephant in the room: ink. A single color cartridge can cost anywhere from $15 to $40, and printing a full banner can drain it fast. The workaround is to design your own black-and-white geometric patterns—think Art Deco fan shapes, mid-century starbursts, or simple diagonal stripes. Print those in black ink only, then color them in by hand with chalk pastels or watercolor paints. This takes about ten minutes per sheet, but the hand-colored effect looks intentionally artisanal, not cheap. Alternatively, skip your home printer entirely. Most public libraries charge between $0.10 and $0.25 per black-and-white page, and many offer free color printing up to a certain page count each day. That means you can print an entire 20-piece banner set for less than the cost of a single greeting card. For the ultimate hack, use your phone’s photo editor to create a simple monogram, then email it to a print shop. A single 11x14 poster print costs between $3 and $8, and when mounted on a foam board (another $2 to $4), it becomes a stunning, reusable focal point for your dessert table or photo backdrop.
Table Settings and Centerpieces Under $10
The table sets the stage for your entire party—and it’s where costs can spiral fastest. Yet with a little creativity, you can build a tablescape that looks professionally styled for less than the price of a takeout coffee. The secret lies in layering textures and repurposing everyday materials. In 2026, the most expensive-looking tables are actually the most resourceful ones.
Layered Table Runners
Skip the $40 polyester runner from the party supply store. Instead, unroll a long sheet of brown kraft paper—a single roll from a dollar store costs between $1 and $3 and can cover a six-foot table twice over. Lay it down the center, letting the edges curl naturally for an organic feel. Then grab a chalk marker (about $2 for a pack of three) and draw a simple, repeating geometric pattern—think chevrons, dots, or a delicate vine—directly onto the paper. The matte finish of chalk on kraft paper mimics expensive hand-printed linen. For the second layer, raid your local thrift store for a length of lace, a sheer curtain panel, or a roll of wide grosgrain ribbon (typically $1 to $4). Drape this over the kraft paper, slightly off-center, so the two textures play against each other. That contrast between rustic paper and delicate fabric is what sells the high-end look.
Mason Jar Utensil Holders
Those brushed-gold acrylic utensil caddies at boutique shops run from $12 to $18 each. You can achieve the same visual weight for mere cents. Gather mason jars—any size works, but wide-mouth pints are ideal—and paint them in a single, cohesive color. In 2026, the trend leans toward deep earthen tones like terracotta, olive, or matte black. A small bottle of acrylic craft paint costs between $1 and $2 and covers three to four jars. Once dry, tie a scrap of fabric, a strip of leather, or a piece of twine around the neck. Fill each jar with your silverware, tucking a single sprig of greenery—rosemary, eucalyptus, or even a weed from your yard—into the side. The uniform color and natural accent create a curated, intentional look that costs under $5 for an entire table.
Floating Candle Bowls
This is the ultimate budget centerpiece that looks like it belongs in a high-end spa. Take a clear glass bowl or a large cylindrical vase (check your cabinets or a dollar store, $1 to $3). Fill it about two-thirds full with water. Add two to three drops of liquid food coloring—a bottle costs about $1 and will last for dozens of parties. For 2026, try a soft sage green or a muted dusty blue rather than the old primary reds. Float a single unscented tea light (a pack of 50 runs from $2 to $4) on the surface, and scatter a handful of flower petals from your garden or a free-foraging walk around the neighborhood. The light refracts through the colored water, casting a gentle glow, while the petals add a romantic, organic touch. The entire setup costs under $2 per bowl, and it replaces the $15 to $25 faux-floral centerpieces that dominate party supply aisles. For a dramatic effect, group three bowls of varying heights down the center of the table.
Themed Decor Without Buying Themed Products
The fastest way to blow a $20 budget is to buy a plastic palm tree, a cardboard Eiffel Tower, or a bag of foam flamingos. In 2026, the smartest party trick is to ditch the literal theme entirely and let color do the heavy lifting. Instead of hunting for “Hawaiian luau” or “Great Gatsby” branded tableware, choose a two-color palette—gold and white, teal and orange, or blush pink and deep forest green—and apply it ruthlessly to every single DIY element you create. This instantly gives your party a curated, editorial feel that screams “custom event,” not “party aisle clearance.” Take plain white paper lanterns and spray-paint them in your two colors, or dye cheap cotton napkins with fabric dye in matching shades. When every streamer, candle holder, and sign follows the same two hues, your brain reads it as cohesive and expensive—even if the materials cost you under €8 to €12 per pack. The themed plastic, by contrast, always looks like exactly what it is: disposable clutter.
Now, step outside. Literally. The single most underrated decor source in 2026 is your local park, forest, or even your own backyard. Seasonal foraging—collecting pinecones, fallen branches, interesting leaves, smooth stones, and dried seed pods—costs nothing but twenty minutes of your time. The key is to treat these finds as premium materials, not nature scraps. Spray-paint a pile of pinecones in metallic copper or matte black, and suddenly they become sculptural centerpieces. Leave a cluster of bare branches in a tall glass vase, and you have a striking, minimalist installation that rivals anything from a high-end florist. Arrange stones in a neat line down the center of a buffet table, or tuck small leaves under glass cloches (which you can buy cheaply at thrift stores) for an instant museum-quality vignette. The secret is to cluster them—three to five items in odd numbers always look more deliberate than a single lonely pinecone. And don’t be shy about mixing the foraged elements with your color palette: a branch spray-painted white against a gold backdrop is pure 2026 luxury. As a stylist friend of mine says, “Nature is the ultimate free decor supplier—and it always looks intentional.” The result is a party that feels bespoke, organic, and far more expensive than the €0 to €5 you spent on the paint and vases—because no one can tell you didn’t hire a professional to source those exact textures.
Avoiding Common DIY Pitfalls
The “Too Much Small Stuff” Trap
The fastest way to make a budget party look cheap isn’t using cheap materials—it’s using too many of them. Beginners instinctively buy fifty small items: tiny vases, scattered confetti, mini balloons, and assorted trinkets. The result is visual noise. In 2026, the “expensive” aesthetic is defined by negative space and restraint. Instead of filling every surface, choose three to four large focal points: one dramatic backdrop, one statement lighting element, one oversized centerpiece, and one photo-worthy frame. That’s it. Everything else—tableware, napkins, plain wall space—should recede. A single 3-foot cardboard circle painted in a matte tone (costing from $4 to $9 per sheet) reads as intentional art. Fifty tiny plastic flowers read as clutter. The secret to looking like you spent $500 is making guests see fewer things, each placed with confidence.
The Time vs. Money Tradeoff
DIY is only a bargain if your hours aren’t worth more than the dollars you save. Some projects—hand-cut paper flowers, balloon garlands with dozens of sizes, or hand-painted signs—can eat three to four hours of your weekend. If you’re hosting in 48 hours, that time is your real currency. Prioritize lighting first: a warm, dim glow instantly upgrades any room. Then build one large backdrop. Skip intricate paper flowers entirely; they wrinkle, sag, and require constant fussing. Instead, lean into rapid, high-impact moves that take under fifteen minutes each:
- Hang string lights in a zigzag pattern across the ceiling or along a wall. The irregular geometry looks deliberate and modern, not lazy. Cost: from $8 to $15 per 30-foot strand.
- Place a single large cardboard circle (or two overlapping ones) on the main wall. Paint it one solid color or leave it raw kraft brown for a trendy organic look. Cost: from $4 to $9 per sheet.
- Fill a large ceramic bowl or glass vase with seasonal fruit—lemons, limes, or oranges—or natural pinecones. This adds color, texture, and a subtle scent without any assembly. Cost: from $6 to $12 for a full display.
These three moves take less than half an hour total, cost under $25 combined, and deliver 90% of the visual impact of a five-hour crafting marathon. In 2026, the smart host knows that “expensive” is about editing, not effort. Cut your losses on anything that requires a glue gun after 9 PM. Your guests will remember the atmosphere, not whether the napkins were hand-folded.
Reusing and Storing Decor for Future Events
The smartest money you’ll spend on party decor in 2026 isn’t on a single showpiece—it’s on the system that lets you use that showpiece again. This year, 52% of hosts report actively reusing key decorative items across multiple events. That’s not just about being frugal; it’s about building a personal inventory that gets better with age. Start by protecting your initial investments. Paper fans, a staple of cheap-but-chic styling, should be folded flat and stored between layers of tissue paper in a shallow box to prevent creasing. LED string lights, the backbone of any warm ambient glow, should be coiled loosely—never wrapped tight around a hand—and placed in a labeled zip-top bag with the battery pack detached. Mason jars, the workhorse of centerpieces, should be washed and dried immediately after the party; residual sugar from punch or wine can etch glass if left overnight.
Create a dedicated “party bin” using a sturdy plastic tote or a reinforced cardboard box. This is not a junk drawer; it’s a curated kit. Inside, keep your neutral base items: the fans, the lights, a roll of double-sided tape, a pack of command hooks, and a set of plain glass votives. When you need to throw a last-minute gathering, you pull out the bin and instantly have a foundation worth $40–$60 in retail value, assembled for under $20 originally.
Then, master the upgrade. The real magic of a reusable decor kit is the ability to shift themes without buying new. For a birthday, paint your cardboard geometric wall shapes a bold terracotta; for a baby shower, give them a soft sage wash. That’s a cost of roughly $2 to $4 per can of spray paint. Change the ribbon tied around your mason jars from burlap (rustic) to velvet (luxe) to silk (romantic)—a $1 to $3 spool refresh. In your centerpieces, swap out sprigs of eucalyptus for dried pampas grass or even faux olive branches, which cost between $3 and $8 per bunch. This simple act of swapping the “living” element transforms the entire feel. Your initial $20 investment doesn’t just last one party; it evolves, so your decor budget works for years, not just one Saturday night.
The secret to a stunning 2026 party isn’t a bigger budget—it’s smarter styling. Mix a few high-impact DIY projects, like draped fabric, painted florals, or ambient candle clusters, with strategic thrift-store finds. That combination reads as custom and curated, not cheap. Focus on texture, symmetry, and lighting; those three elements do 90% of the “expensive” work for you. Before your next gathering, pick just two ideas from this list—maybe a dramatic backdrop and a glowing centerpiece—and build the rest around them. You’ll spend under $20, win every compliment, and still have cash left for the cake.
Frequently asked questions
What are the most impressive cheap DIY decor ideas for a 2026 party?
Focus on large-scale, high-impact pieces made from inexpensive materials: oversized paper flowers from tissue paper, geometric balloon garlands in monochrome palettes, and floor-to-ceiling crepe paper backdrops. These read as expensive because of their size and visual density, not their material cost.
How can I make a DIY balloon arch look high-end without buying a kit?
Skip the pre-made kits and instead buy loose balloons in just two or three shades of the same color, then use a simple fishing line and command hooks to create a freeform, organic cluster. The key is to vary balloon sizes and deflate them slightly for a matte, understated finish—glossy over-inflated balloons scream ‘cheap’.
What lighting tricks make a cheap party look impressive in 2026?
Use warm-white LED string lights (not colored) draped in unexpected places—inside glass vases, along table edges, or behind translucent fabric—to create a soft, ambient glow that hides imperfections. Battery-operated puck lights under clear glass or plastic bowls filled with dried citrus or faux ice instantly elevate a table setting.
Are there any sustainable or upcycled decor ideas that look fancy for less?
Yes, collect empty glass bottles and jars of varying heights, spray-paint them in a single metallic or matte tone, and use them as candle holders or single-stem vases. Also, cut old bedsheets or thrifted fabric into long strips to make a rustic fringe backdrop—this looks intentional and high-fashion, especially in neutral earth tones.
How do I create a stunning centerpiece on a tiny budget?
Group three to five identical low bowls or trays (check dollar stores) and fill them with a single type of filler—like polished river stones, fake moss, or floating candles in water—rather than mixing multiple elements. Repetition creates a curated look; add one tall, dramatic stem (like a dried pampas grass or a single monstera leaf) to one bowl for vertical interest.
What's the best way to use paper or cardboard for decor without it looking flimsy?
Build large, geometric 3D shapes—like hexagon shelves or diamond clusters—from corrugated cardboard, then paint them with a matte latex or chalk paint in a deep jewel tone. The key is to use sharp, clean cuts and to seal the edges with painter’s tape before painting, so it reads as solid sculpture rather than packing material.
How can I make a photo backdrop that looks professional for under $20?
Use a cheap plastic tablecloth in a solid color (or a drop cloth) and attach a grid of fresh or faux greenery (like eucalyptus stems from a craft store) using safety pins, spacing them evenly. Alternatively, create a ‘confetti wall’ by cutting strips of metallic wrapping paper and hanging them vertically with clear tape—the shimmer catches light and hides any unevenness.
What are some 2026-specific trends in cheap DIY decor I should know?
The big trend is ‘quiet luxury’—think textured neutrals (linen-look napkins, rattan placemats, and matte ceramic vases) rather than glitter or bright colors. Also, ‘digital-physical hybrid’ decor: print free QR codes on cardstock and place them near DIY stations or menu items, then frame them in cheap IKEA-style frames for a sleek, tech-forward look.
How do I avoid my DIY decor looking homemade or messy?
The secret is in the finishing details: use a hot glue gun for clean seams, trim every string or ribbon at a 45-degree angle, and ensure all elements are aligned with a level or measuring tape. Also, stick to a strict color palette of no more than three colors—one neutral, one accent, and one metallic—to create visual cohesion.
Can I reuse decor from one party to another without it looking repetitive?
Absolutely—invest in neutral base items like white linen-look tablecloths, clear glass vases, and wooden crates, then change the accent colors with cheap consumables like spray-painted foliage, dyed rice in jars, or colored cellophane. In 2026, modular decor is huge: build a ‘base kit’ and swap out the top layer (like a different color of dried flowers or a new printed backdrop) for a completely fresh look.